


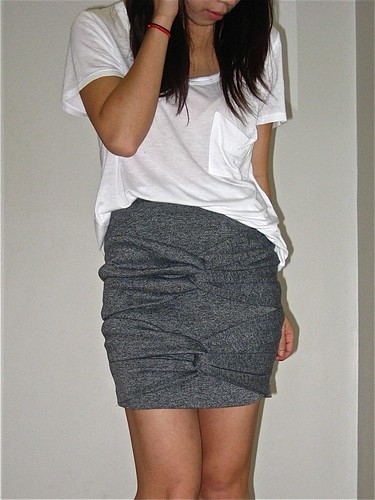
It was a pretty simple project and didn't take much time to make...not to mention super comfortable and earth friendly! The waistband was a bit tricky for my untrained self, so it's only half sewn until I think of some brilliant way to fully secure it. Ideas are always welcome!! (help me) haha. Here are the DIY instructions compiled from the original post by Anywho and the ever inspiring Angie over at Sewithought with her take on the skirt.
1. Use a high waisted bodycon skirt as a pattern (I added about 1/2″ around for seam allowance I also added about 3 inches on the top of mine to make a waistband. Because I made mine from an already made item I used the hem of the dress so if you are not remaking an item you may want to add some allowance for a hem.)
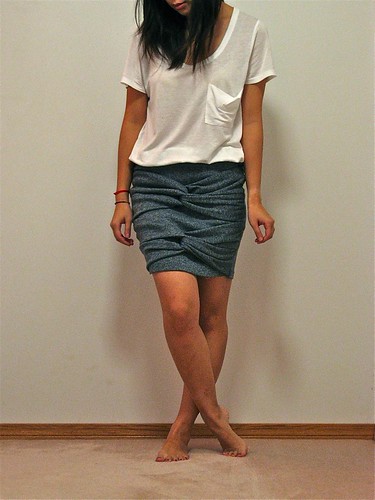
2. Cut 8 wide pieces. (I cut 4 pieces and folded them in half – my pieces were 10 inches wide and 24 inches long. Sew these pieces in order to make 4 tubes)
3. Cross two tubes to achieve a draped affect. Repeat with the remaining two. (Just use the front piece of your skirt for this.
4. Pin everything down all the way around then take the back of the skirt and attach it to the front piece. (I pinned my draped pieces down and sewed them on before attaching the front and back pieces together.)
Happy sewing day everyone!
Wow! That looks really nice! =]
ReplyDeleteIf only I knew how to use a sewing machine... and had a properly functioning sewing maching as well.....
I love it! I think your version of this skirt is my favourite so far. I have to try this!
ReplyDeleteso sadly i cannot sewing and i really like ur DIY burberry skirt. isn't it lovely mix with the with lose shirt?
ReplyDeleterchliey.blogspot.com
I like yours better than the original!
ReplyDeletewow!!! that turned out amazing! i want to try it! if i ever have time from sewing school projects....
ReplyDeleteWE should skype sometime and I can help you with the wasitband!!
Very cute! Love your t-shirt, where is it from?
ReplyDeletethanks! it's from the Canadian brand Joe Fresh. Check out the site!
ReplyDeletewww.joe.ca
I've been meaning to make this one! Yours looks awesome!!
ReplyDeletethanks! i've been meaning to buy one of your hats!
ReplyDeleteI have read your blog its very attractive and impressive. I like it your blog.
ReplyDeletehow to improve sales